Installing the RFgen Windows CE Client
The RFgen Mobile Client (the CE Client.exe) for Windows CE installs software enables communicate between the device and the RFgen server.
In order for a Windows CE to process data, the client needs to be able to communicate with the server, be configured to work as an RFgen client, and have the specific applications for transacting data installed. The RFgen solution deployment feature that packages these configurations/files is called a Profile. Profiles are created in the Mobile Development Studio and transferred to the client inside a CAB file. (In other words the CAB file is the format used to package a Profile created in RFgen.)
Installing to the RFgen Server
The RFgen Client software (which you download from the RFgen Portal) installs CE-version specific software that enables the client to communicate with the server, and it also provides files used by the Mobile Development Studio to build CAB files.
Therefore, before you can deploy any solution to a Windows CE device, you'll need to install the RFgen Client software on the same server where your Mobile Development Studio resides.
Note: By default, this package installs to c:\Program Files (x86)\RFgen52 folder. If you installed the 64-bit version of the RFgen 5.2 Mobile Development Studio or installed the 64-bit version of the RFgen 5.2 Mobile Unity Platform server, make sure the RFgen Client installs to the same folder (i.e C:\Program Files\RFgen52). By having them in the same RFgen folder location, the Mobile Development Studio will be able to locate the files needed when you are ready to build or deploy files to the client.
RFgen Client Install Process
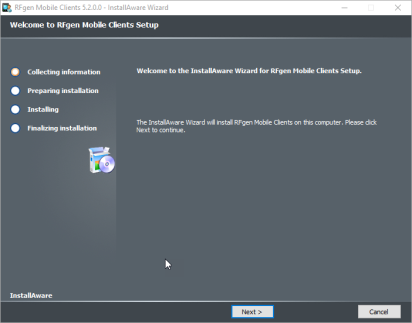
1. After you downloaded the RFgen Client package, launch it as you would any other Windows application.
The Welcome screen displays.
 \
\
2. If you need to exit the process, click Cancel. Otherwise, click Next to continue the install process.
3. The License Agreement screen displays.
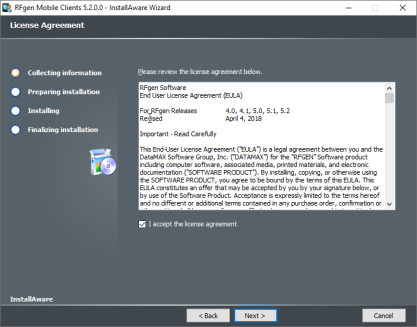
4. Click the checkbox and then click Next to continue.
5. The Destination Folder screen displays.
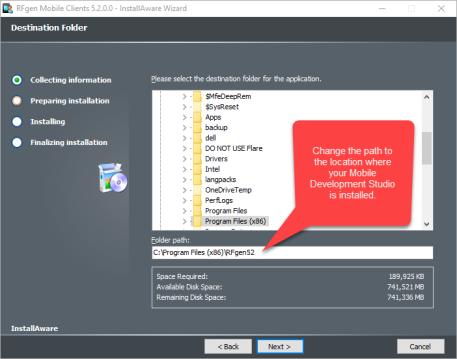
6. Change the path to the location where your Mobile Development Studio resides. For example, if you installed the 64-bit version of the Mobile Unity Platform server, its default path is C:\Program Files\RFgen52.
7. The RFgen Mobile Clients Warning screen displays. Click Yes to continue; No if you want to go back and change the path again.
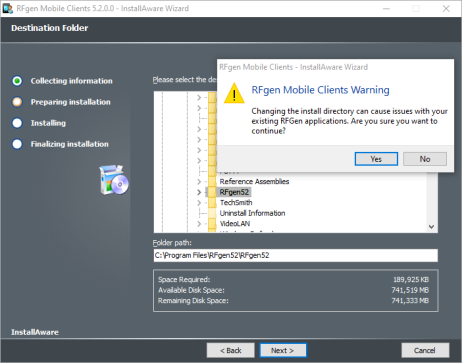
8. Click Next to continue.
9. The Ready to Install screen displays.
10. Click Next to continue. When its done, click the Finish button.
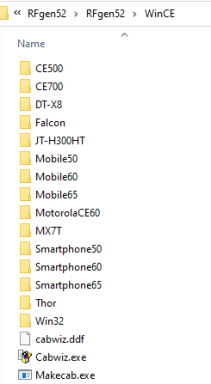
11. Note that the RFgen 5.2 folder under the parent RFgen 52 folder contains the various Windows CE device files and Cabwiz.exe and Makcab.exe files.
12. Now you are ready to prepare your CAB files for Windows CE. For more details, see Solution Deployment and To Create CAB files.