Connection Tab
The Provider Name selection will depend on the type of database you want to use. Note that these providers are not necessarily installed. All provider options must already exist on the server to be used.
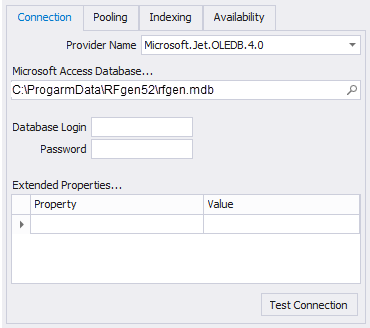
For an Access database select the appropriate Provider Name for the type of system (32 bit or 64 bit).
The path, login, password and extended properties are then used to make the connection. In the case of Access most of these fields are not necessary.
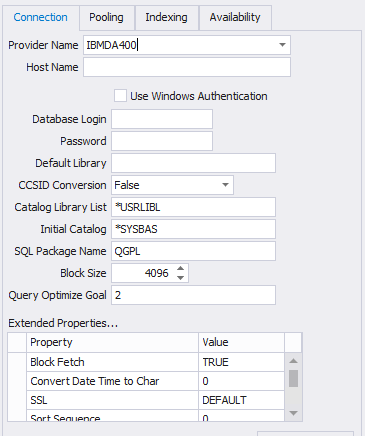
In the case of DB2, you can specify all the same settings that would normally go in the ODBC DSN entry for the iSeries Access driver.
For ODBC DSN entries that come from Control Panel / Administrative Tools, this option assumes that the connection has already been established the server will just reference what is setup in Control Panel. This option should be used if other programs also rely on the same database connection and it is easier to maintain the settings in one place rather than many.
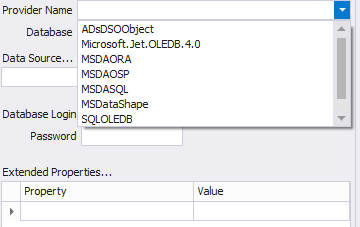
The OleDb option is the most generic method of connecting to a database. The Provider Name shows many options, most of which need to be manually installed (acquired by the manufacturer) before the server can take advantage of them.
In the case of Oracle, ODBC is not used but the TNS Server Name points to the Oracle server. Also specify the Provider Name and review the Extended Properties for accuracy. The Use Windows Authentication option will take advantage of the Active Directory when connecting to the database.
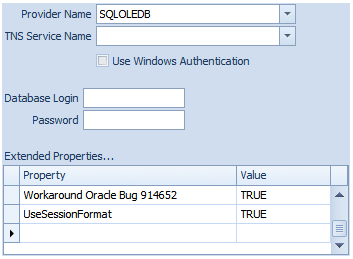
For SQL Server specify the Provider Name, Server Name and Database Name. The Use Windows Authentication option will take advantage of the Active Directory when connecting to the database. If you want to connect directly to the MDF file itself, specify the Attach Database File option and locate the database file directly. The Logical Name is typically the filename without a file extension and should not be necessary.
The Extended Properties are usually not required.
![]()
For SQLite database connections just specify the DB file itself. There are no other settings. You can specify a location and name that does not exist and clicking the Test Connection button will create the database for you.
Finally click on the Test Connection button to verify connectivity. If the database has not already been setup to support the solution tables they will be created at this time. Clicking the Save Changes button will also create what is necessary but won’t test the connection. Either button will also notice if the database came from an older release and ask if you want it upgraded.