To Add a Device Skin
If the device image (skin) for your target device is not listed under Devices, you can upload your own device skin, set the display's resolution and parameters, save the image, then use it for application design purposes.
Image and Information Requirements
The image must have the screen area cut out so the background is transparent. The width at the top/bottom of the screen to be the same for application layout/design purposes. The transparent area helps RFgen detect the application form/display area, so this should be as accurate as possible.
The best file types to use are png, jpeg or bmp. Do not use gif. RFgen does NOT accept files from applications such as PhotoShop or CoralPaint. (If you modify a file in one of these tools, make sure you export or save it as png, jpeg, or bmp. RFgen can accept high resolution files as RFgen has a built-in tool to reduce the size if the image if its larger than the RFgen Development Studio interface.
You will need the screen's dimensions which you can obtain from the Device Product Datasheet or Specification. It should list the screen width and height in pixels, the screen size (measured diagonally across the screen), and the screen resolution DPI. If the manufacturer datasheet /specifications did not provide the product’s screen dpi, you can calculate the dpi by:
a. Adding the squares of width (pixels) and height (pixels).
b. Getting the square root of the sum from step a.
c. Dividing the square root from step b by the screen size (inches). This gives you the dpi.
Steps
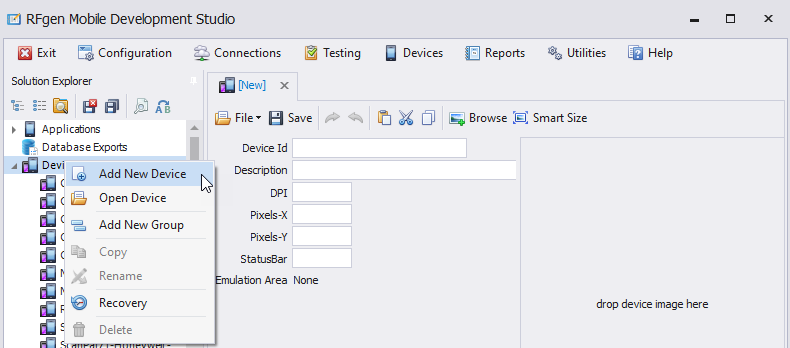
1. From the Solution Explorer > Devices node, right-click on Devices and select Add New Device.
A "[New]" tab displays.
2. Click the Browse icon. A Windows browser pop-up displays.
3. Select the image file to be added. Click Open. The image displays as shown below.
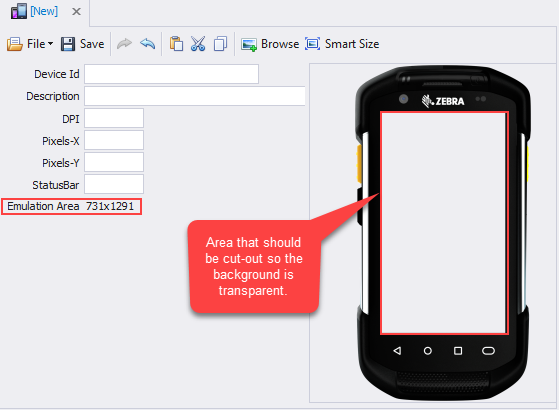
4. Enter the Device Id, Description, DPI resolution (dots/inch), screen width (Pixels-X) and length (Pixels=Y).
Refer to “Image and Information Requirements” above for details on obtaining the proper information. If RFgen cannot detect the cut-out area for the screen, the words "Emulator Area None" under the status bar.
Note: Commas are not accepted values for DPI, Pixels X or Y.
The Status Bar can be left blank or filled in. This value dedicates the screen area consumed by the status bar so RFgen knows how much to use for the form display area.
5. Click Save. You are now ready to use the Target Device in an application form.
TIP
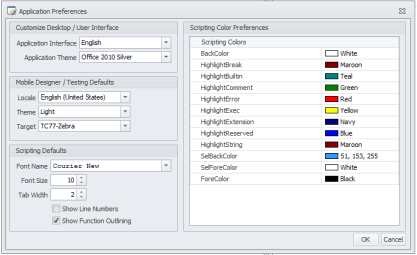
If you want ALL of your devices to use this particular device, open Configuration > Application Preferences, and set Target Devices to the desired device. This setting will apply to new application forms but it will not overwrite settings in existing applications.
If you need to share this image file with another RFgen server, you can export it using Utilities > Export Solution Files: <select desire Device Files to be exported>. Enter the destination Windows File System location and click Export. A message will display when this is done.