To Add a Customized Keyboard
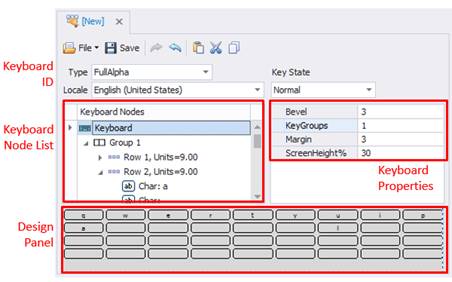
The Solution Explorer > Keyboard feature enables you to add a soft input panel (SIP) / virtual keyboard to your mobile application in the event the device lacks a keypad or touchscreen, or, if special characters/functions are needed to complete an input.
There are two methods available for adding a SIP:
a) Import a pre-configured keyboard from Utilities > Import Solution Files
b) Create a new keyboard as described below.
Before you start -- decide what type of keyboard you need.
1. Right-click on Keyboards and select Add New Keyboard to add a keyboard, or select an existing one under the Keyboards node.
Depending on your selection, a screen similar to the one below will display.
***If you imported a keyboard file, it is added automatically to the Solution Explorer > Keyboards and is formatted for you; you can jump to step for the character/function key to be modified.
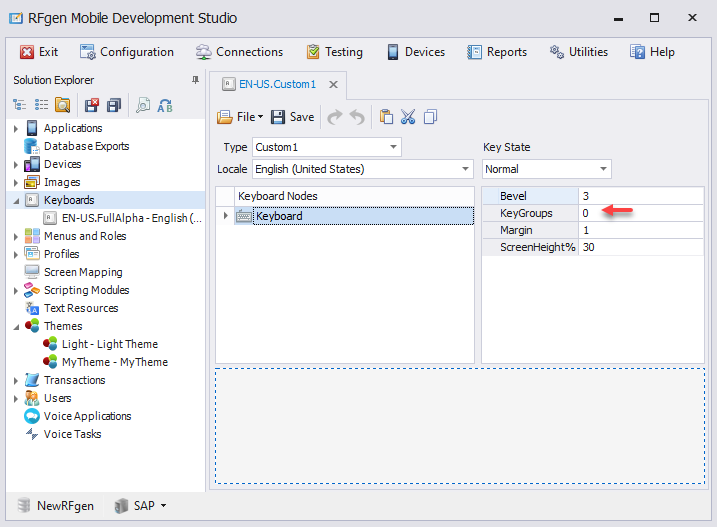
2. Select a Type, Locale, and Key State from the drop down list. Change the default of 30% of your target screen height (ScreenHeight% ) if needed.
3. The Keyboard is organized by KeyGroups-- groups of common character types. For example, one for function keys, the second for alphabetical keys, and the third for numbers.
4. Enter the number of groups you want for KeyGroups.
5. After you enter a number for keygroups, each group is added under Keyboards.
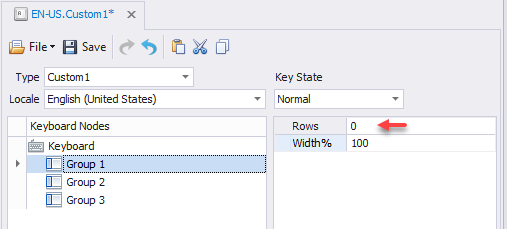
6. Select a Group, then enter the number of rows desired for each group. Unless needed, keep the width as 100 percentage for groups width for each row.
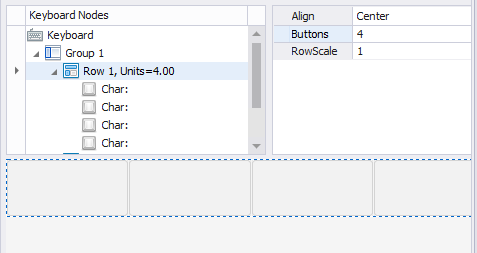
7. The rows are added under each group. Select a row and enter the number of Buttons. Keep the RowScale as 1 for now.
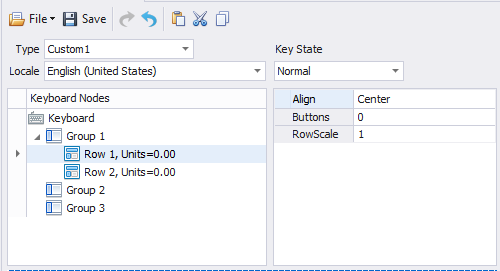
8. After you enter the number of buttons/row, the row units will equal the number of buttons. A list of characters are added under the row and in the display area, an layout of the row.
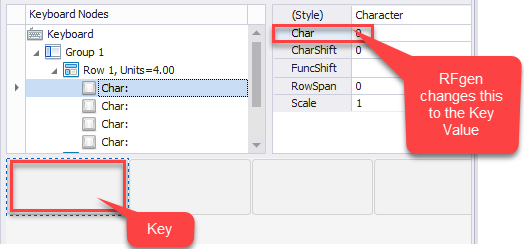
9. Select a character under the row, and then enter the values you want display on the key of the keyboard. For example, if you want the first char in the row (far left) to be the number "1", enter "1" for the Char value (upper right). RFgen automatically changes the Character to the Key Code Value for the local of the keyboard. For example "1" is key code value 49.
10. Repeat assignment of the values for all characters in each row for each group.
Related Topics:
See Configuring Environment Properties > Menus and F-Keys for details on mapping F-keys.