To Limit User Access to Applications in a Shared Menu
If you want to limit some users (Warehouse employees) from having access to certain applications (i.e. administrative applications) while providing access to other applications in a menu assigned to users with different roles, you can do with by entering role names in the application, assigning the roles to the users in the Solution Explorer > Users group, and also setting up which roles are able to access a menu in the Solution Explorer > Menus and Roles profiles.
For more details on how this works or to set the role name via script rather than the user interface, see the topic "Users".
To enable application access to specific users
- Navigate to the Solution Designer > Applications > Form.
- In the Form Control Properties > Role Properties, enter one or more role names. In our example, we have a Cycle Count application that should be accessed by the RFgen Administrator and all warehouse clerks. So we setup two roles: "Admin" and "Inventory Clerk" . We also have a Human Resources app that we want ONLY the RFgen Administrator to access, so in that application's Form Control > Role Properties field, we only enter "Admin".
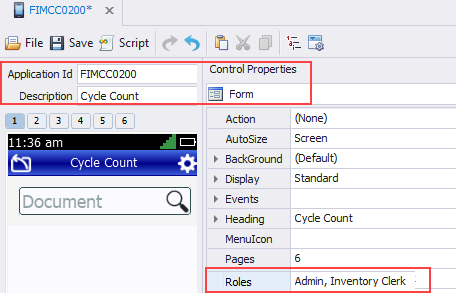
- Save the changes.
- In the Solution Designer > Users > [user profile] screen, add the role name to the Role tab.
For example, if you had a user named Chris who is the RFgen administrator and needs access to all applications, enter "Admin" in Chris' Role tab.
For all other users who process inventory but should not have access administrator type of applications, enter "Inventory Clerk" in their Role tab.
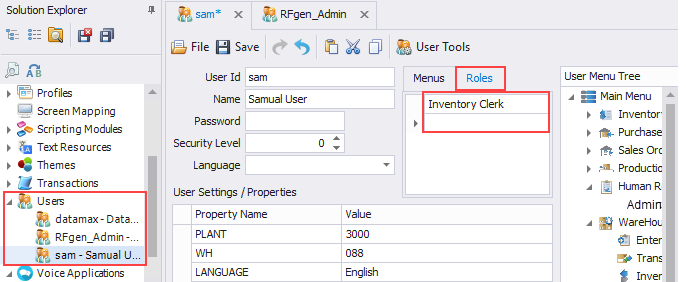
- In the Solution Designer > Menus and Roles> [Menu profile] screen, assign the Application(s) to the Menu tab.
For our example, a menu called "Main Menu" was already created in the Menus and Roles folder. This Main Menu already an Inventory Submenu and an HR submenu assigned. In this case, we add the "Admin" and "Inventory Clerk" roles added to the Main Menu Roles tab.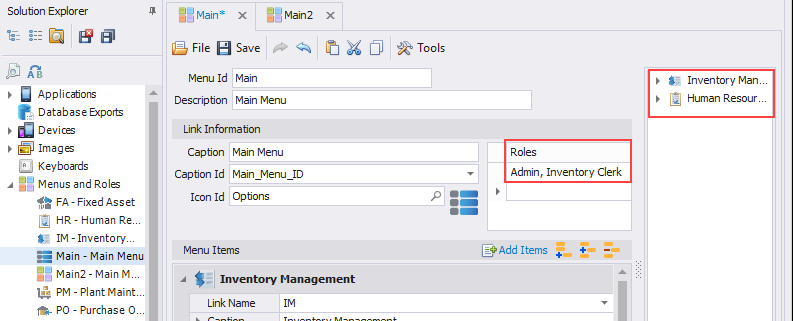
The Cycle Count from step 1 is added under Menu Items so it will be a member of the"Main" menu.
Click Add Items icon. In the empty table select the down arrow under Link Name, and select the Cycle Count app.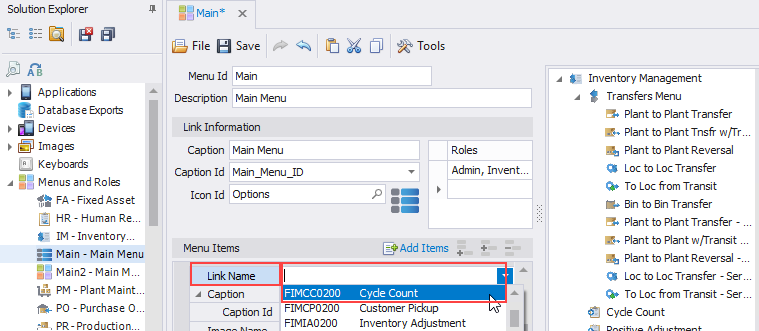
This step is repeated for the HR application. Now the Menu "Main" is comprised of an couple of Inventory apps and an HR app.
Optional: Click on the Menu Simulator to preview your menu.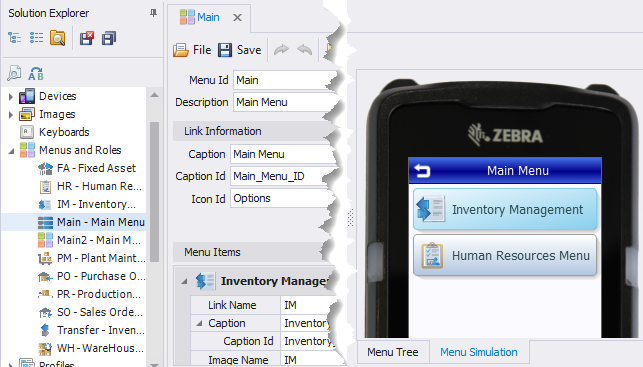
- Return to the Solution Designer > Users > [user profile] screen.
Assign the Menus for the User via the Menus tab. Select the user from the tree, and enter "Main" in the Menu's tab
In our example, the RFgen Admin and Sam (Warehouse employee) are both assigned the "Main" menu in the Menu tab.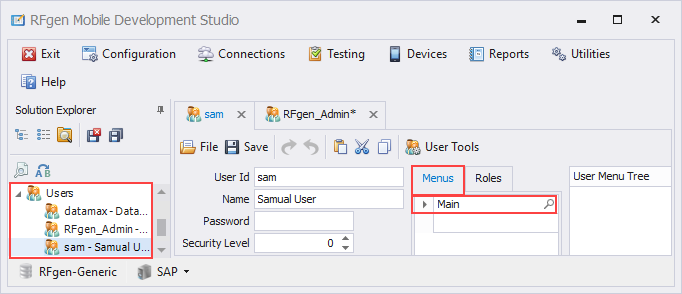
- To test the menu, go to Testing. When Chris logs in, Chris will see the Main menu and have access to the apps that contain the tag "Admin". When other users with the Inventory Clerk role login, he or she will see the Main menu but only those apps which had the role "Inventory Clerk" assigned.